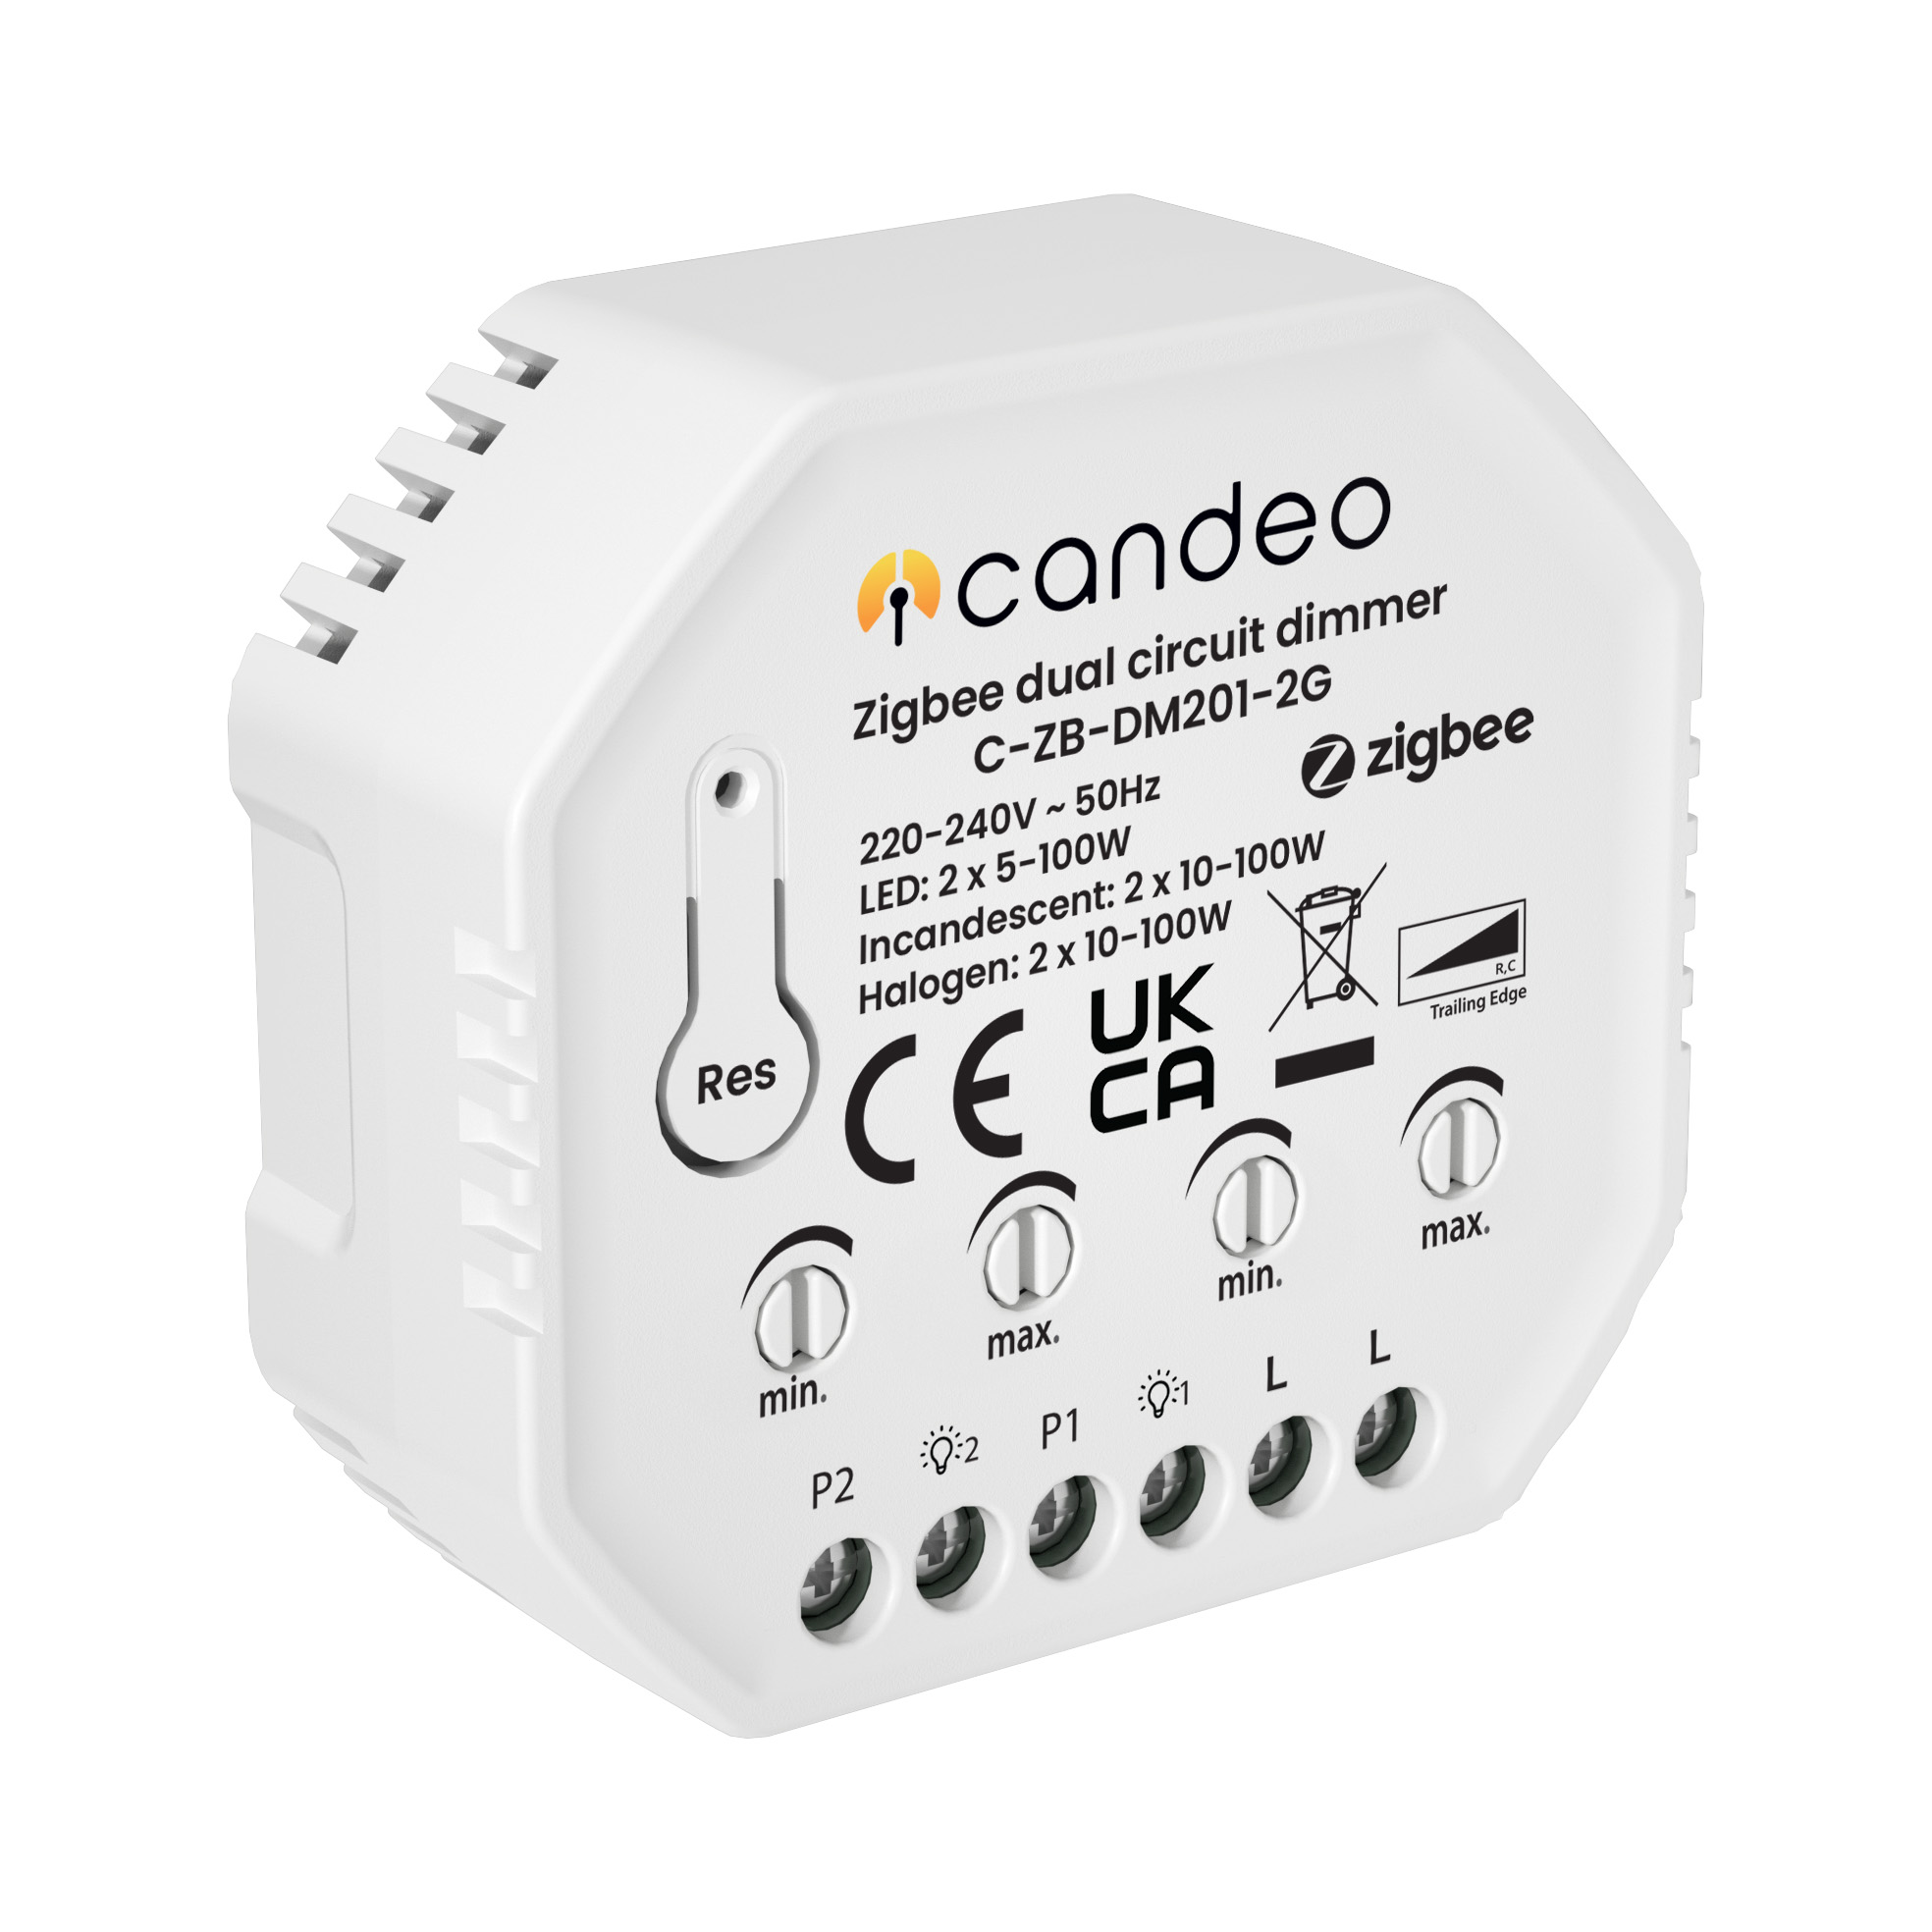
[C-ZB-DM201-2G] How do I pair my zigbee lighting module to Hubitat Elevation?
- Factory Reset the module:
- Press and hold the reset button for 5 seconds.
- The LED will go red for 10 seconds, after which the reset is complete.
- Import the custom driver:
- On your Hubitat instance go to Drivers code.
- Click "+ New driver".
- Click "Import".
- Paste the following into the box that pops up:
- Click "Import".
- Click "Save".
- Now please repeat the process, but pasting this address instead:
https://github.com/candeosmart/hubitat-zigbee/blob/main/Candeo%20C-ZB-DM201-2G%20Zigbee%202-Gang%20Dimmer%20Module%20Child%20Switch.groovy  Please note you only need to import the driver once for each model. After the import all new C-ZB-DM201-2G devices will pick up the new driver. We recommend any C-ZB-DM201-2G devices previously added are unpaired and then paired again after a factory reset.
- Initiate pairing mode to pair to Hubitat. (Adding to your Zigbee Network)
- Open your Hubitat dashboard.
- Go to devices.
- Click "Add Device".
- Under "Add device manually" select zigbee.
- Put the lighting module into pairing mode:
- Double press the reset button.
- The LED will start blinking blue indicating that the module is in pairing mode. Pairing mode will time-out after 15 minutes.
- The LED will stay solid blue for 10 seconds once pairing is complete.
Related Articles
[C-ZB-SM205-2G] How do I pair my zigbee lighting module to Hubitat Elevation?
Factory Reset the module: After powering on the module for the first time, the lamp should blink. If it does not blink, you will need to factory reset the device. To do this, press the reset button 5 times. If the module is not accessible, switch the ...
[C203/C204/C-ZB-DM204] How do I pair my Zigbee lighting module to Hubitat Elevation?
Factory reset the module: After powering on the module for the first time, the lamp should slowly blink. If it does not blink, you will need to factory reset the device. To do this, press the reset button 5 times. If the module is not accessible, ...
[C205] How do I pair my Zigbee lighting module to Hubitat Elevation?
Factory Reset the module: After powering on the module for the first time, the lamp should blink. If it does not blink, you will need to factory reset the device. To do this, press the reset button 5 times. If the module is not accessible, switch the ...
[C201] How do I pair my zigbee lighting module to Hubitat Elevation?
Please note the new driver is currently for product codes #10 and above. Do not install it if your product code # is below 10. You can identify the # code on the back of the device. If you have multiple devices, of both compatible and incompatible ...
[C-ZB-RD1/C-ZB-RD1P] How do I pair my RD1/RD1-Pro Zigbee rotary switch to Hubitat Elevation?
Firstly, we recommend doing a factory reset: Turn on the light, press the knob 5 times with a long press (3 seconds) on the fifth time. Once reset successfully, the red LED will stay on for 3 seconds. Import the custom driver: On your Hubitat ...